This article explains how to enable authentication in Gentoo Build Publisher using API keys to secure the server's access via GraphQL.
The gbpcli command-line tool (client) communicates with Gentoo Build
Publisher (server) by way of a GraphQL API. Some of
the gbpcli subcommands (e.g. pull, tag, etc). change the state of the
server. By default these state-changing operations require no authorization.
This article explains how to introduce API keys to the server to add
authentication and authorization to a GBP server.
Note: this article assumes you have a Gentoo Build Publisher instance that was installed via the Install Guide.
Note: Because passing API keys over unencrypted HTTP exposes them to potential interception, it is recommended to configure the GBP nginx instance to communicate via HTTPS. This article may be a starting point to help with that.
How Auth Works in Gentoo Build Publisher
As I mentioned authentication (auth) is turned off by default. Whether or not
auth is enabled is determined by the API_KEY_ENABLE setting
(BUILD_PUBLISHER_API_KEY_ENABLE environment variable). After this setting
is turned on, certain GraphQL operations that change state (mutations) on the
server will require the client to send an API key with the request. API keys
are managed via the gbp apikey subcommand. This subcommand is only available
on the server.

Note:
apikeyand other "server-only" subcommands will not require authentication and in fact don't communicate via the GraphQL interface. As such one should assume that anyone with shell access to the server can achieve full access to the GBP service.
Creating the "root" Key
API keys are stored in the GBP database. As the keys are secrets, they are stored encrypted in the database. The key used to encrypt and decrypt the secrets is called the "root" key. Therefore the root key needs to be created prior to the API keys.
Note: The root key should be kept secret. Also changing the root key on the server means that any API keys created with the previous root key will not be decryptable. Therefore if/when changing the root key, all API keys will need to be deleted and potentially re-created.
To create the root key, log into the GBP server and then:
# cd ~gbp
# source /etc/gentoo-build-publisher.conf
# export DJANGO_SETTINGS_MODULE
# gbp apikey create root
smnQi5l-wA3OvJEhazx--Pon6qX0MB3IFpBTKR-Bffo=
This will output a root key to standard output. This key is not saved to the database (that would be a chicken-and-egg issue). Instead you must copy this value and add it to the gbp config file. Copy it at once as it will never be displayed again.
# /etc/gentoo-build-publisher.conf
...
BUILD_PUBLISHER_API_KEY_ENABLE=yes
BUILD_PUBLISHER_ROOT_KEY=smnQi5l-wA3OvJEhazx--Pon6qX0MB3IFpBTKR-Bffo=
Then restart the Gentoo Build Publisher services:
# systemctl restart gentoo-build-publisher-wsgi gentoo-build-publisher-worker
You'll know that this is working because, e.g., now publishing a build will fail:
# gbp publish base
[{'message': 'Unauthorized to resolve publish', 'locations': [{'line': 2, 'column': 3}], 'path': ['publish']}]
Your GBP instance is now configured for auth. Next you'll need to create client keys.
Creating Client Keys
To create client API keys, you use the same gbp apikey create command that
you used to create the root key, except provide a user other than root. Our
GBP instance now needs an API key, so let's create one:
# cd ~gbp
# source /etc/gentoo-build-publisher.conf
# export DJANGO_SETTINGS_MODULE BUILD_PUBLISHER_ROOT_KEY
# gbp apikey create gbp
ba20ac9846cec619bdcadd728f3b976b2c2716c6509ffe48
Again, copy this value at once. Now that we have a client key, we must reference in a gbpcli configuration file.
# mkdir -p ~/.config
# touch ~/.config/gbpcli.toml
# chmod 0600 ~/.config/gbpcli.toml
Edit the file to reference the newly created key:
# ~/.config/gbpcli.toml
[gbpcli]
auth = { user = "gbp", api_key = "ba20ac9846cec619bdcadd728f3b976b2c2716c6509ffe48" }
To verify your client key, run gbp publish command again. It should succeed
without the "Unauthorized" error.
Create additional client keys as needed.
Enabling Auth with Jenkins
Because the Jenkins service interacts with Gentoo Build Publisher's GraphQL
interface to push builds to GBP, we will also need a separate API key for
Jenkins. We'll also need to create another, temporary gbpcli.toml file that
can be uploaded to a Jenkins credentials entry. So make sure that you create
this file on the same system that you use to access Jenkins's web interface.
But first, create an API key for Jenkins:
# gbp apikey create jenkins
3a23395b0009f7effda97ad4e71e43bd9f7e337723612279
Again, copy this key.
Next we're going to create a temporary gbpcli.toml to upload to Jenkins.
# touch /tmp/gbpcli.toml
# chmod 0600 /tmp/gbpcli.toml
Edit the file to reference the newly created key:
[gbpcli]
auth = { user = "jenkins", api_key = "3a23395b0009f7effda97ad4e71e43bd9f7e337723612279" }
Now log into your Jenkins instance and create a secret. Then from the Dashboard navigate to:
Manage Jenkins > Credentials > System > Global credentials (unrestricted) > Add Credentials
Fill out the form as follows:
| Kind | Secret file |
| Scope | Global |
| File | /tmp/gbpcli.toml |
| ID | [blank] |
| Description |
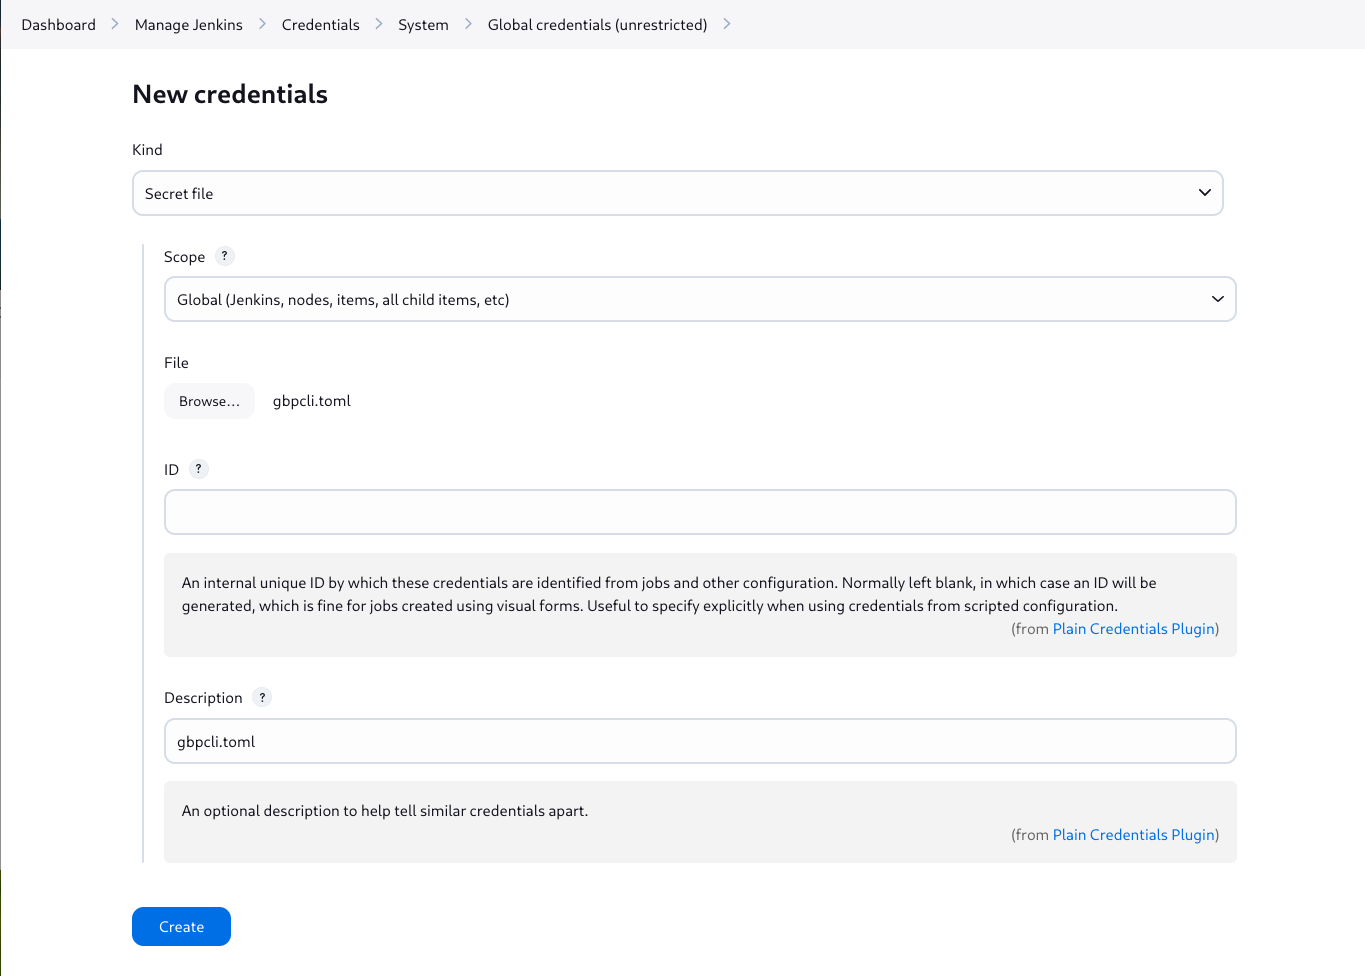
After clicking the Create button, the credential is created and an ID is assigned. Copy this ID as we'll need it for the next step.
Now let's go to your machine definitions repo. Assuming you have forked the
gbp-machines
repo,
edit the Jenkinsfile on your forked repo. You'll want to add en environment
variable GBPCLI_CONFIG to the environment section:
    environment {
        machine = "${env.JOB_BASE_NAME}"
        build = "${env.BUILD_NUMBER}"
        GBPCLI_CONFIG = credentials('6b6c7fa7-80f0-4084-a3a9-cc8ed87453d0')
    }
Replace 6b6c7fa7-80f0-4084-a3a9-cc8ed87453d0 with the ID that was created
for your Jenkins credential file.
Now commit the change and push it to your git repo. The next time Jenkins
goes to build a machine it will pick up the change and the GBPCLI_CONFIG
environment variable will be assigned in the job with a file pointing to the
credential file. When Jenkins wants to push a build, it executes gbp pull.
The gbpcli tool then finds the API key provided by the value of the
GBPCLI_CONFIG environment variable, and that user/key is used to
authenticate with your Gentoo Build Publisher instance. If all goes well,
your GBP server will show something like this:

Conclusion
Using the above steps, you can secure your GBP installation. Removing a
client's access is as simple as running gbp apikey delete <name>. command.
To temporarily turn off authentication on your GBP instance, change the
BUILD_PUBLISHER_API_KEY_ENABLE setting to no and restart the services.
And remember to keep your keys safe by restricting who has shell access to the
server and enabling HTTPS.